HELLO DEAR FRIENDS.....
Thank you all so much for allowing me to express my self during this time. The support I received both here and in my "real" life ( as opposed to electronic life) was much appreciated.
Now to resume somewhat normal programming I have tried to put together a tutorial on a little drawstring bag that I know as the "origami" bag.
I was given this pattern many years ago and it had no designer or copyright on it. I have also googled it and have again found no designer claiming it as their original....so now we can get down to it!
This is one I had prepared earlier and what I hope you can achieve by the end of the lesson.
Firstly you will need two pieces of fabric and approximately 1m of cord.
All seam allowances are 1/4 inch.
CUTTING
Cut both fabrics to an 18.5 inch square.
Now a trick to determine if indeed the fabric is square is to fold it on the diagonal and see if all sides match up. You will soon see if one side is slightly too wide.
ASSEMBLY
Stitch the two squares together, by placing both right sides together and stitch around all the sides......leaving a small opening so you can turn the sown square right sides out.
Turn so right sides are now outward
Slip stitch the opening closed
So now you will have a fabric placemat type of thingy.
Now comes the origami folding.
With fabric you want for the inside of the bag facing uppermost , fold into thirds making sure the points touch the opposite fold.
Fold Point A to Point B.
Now hand stitch through the two folded layers from point A to B to C.
When you have done this you should have something like this.
The folded layers are secured and you will have a tube type of thingy.
Now find the centre by folding the piece in half.
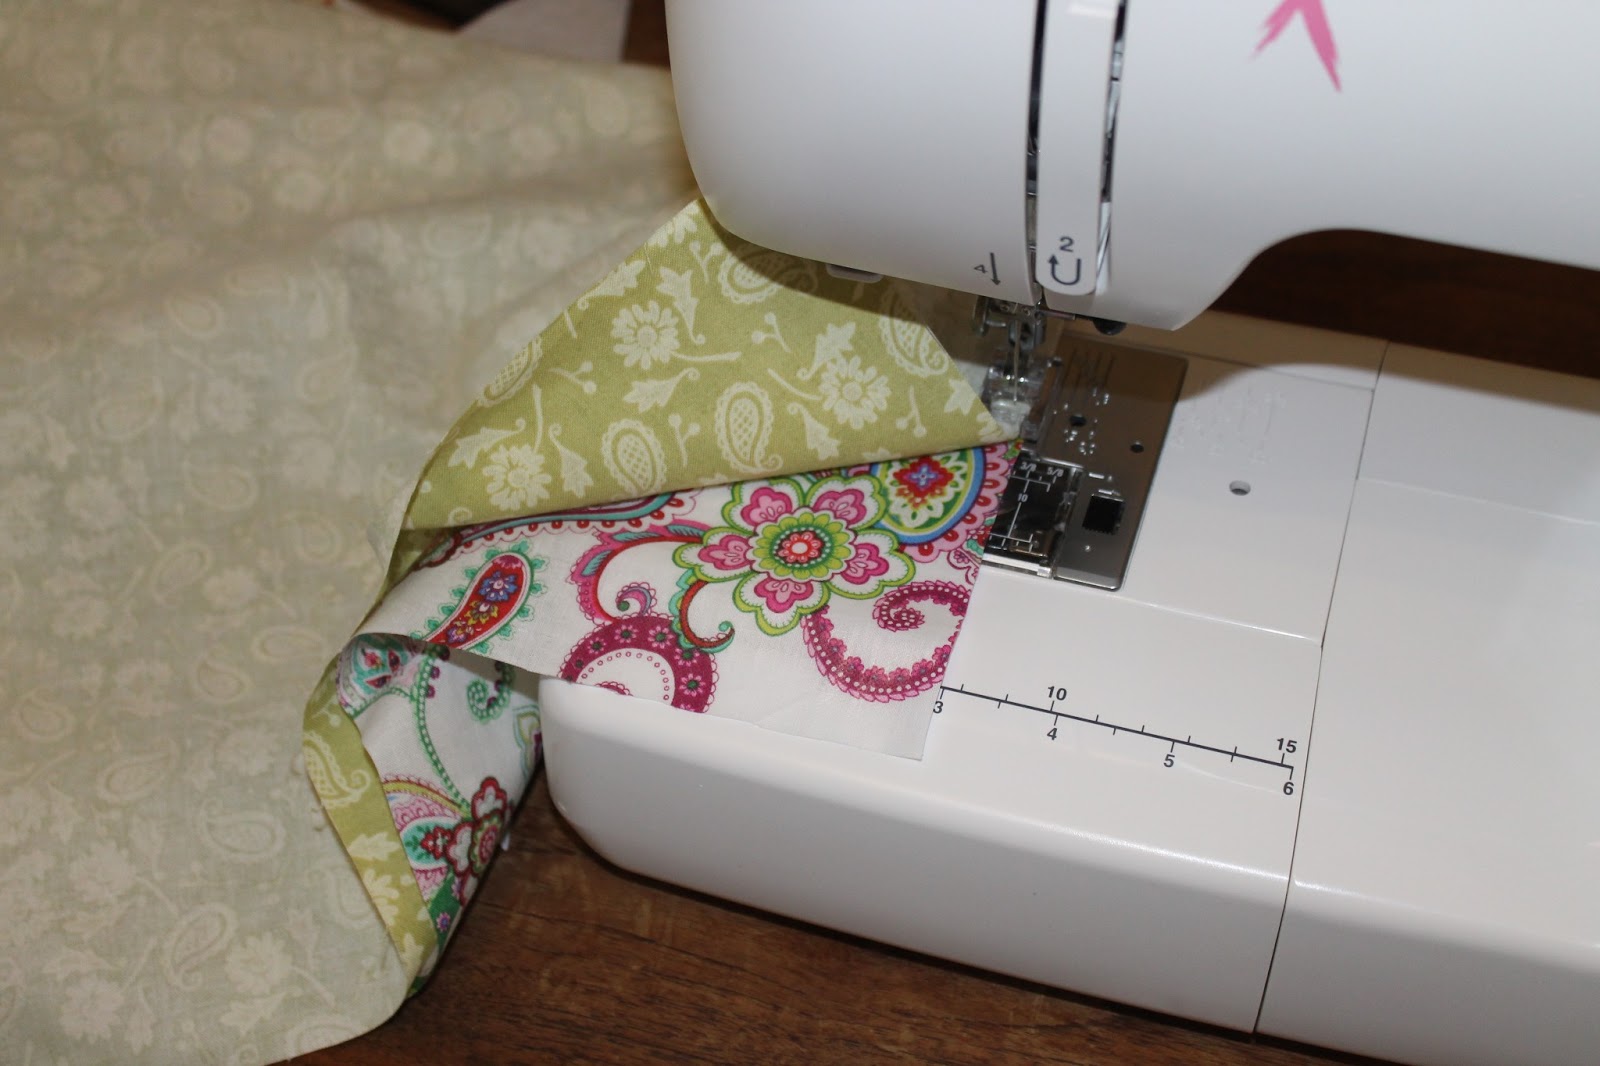
and sew by machine through ALL layers.
More folding now..( origami bag remember)
Fold the triangular ends in towards the sewn line, leaving a
2 1/2inch gap between the points.
The crayoned in sewing lines may help make sense of the following instructions...or not...:-)
Measure in one inch from the folded sides and mark with pins.
Sew along the folded side one inch in, repeat other side.
Go back and sew another line parallel BUT now only 1/4 inch in from the folded side
Now you have a casing for the drawstring.
Fold the bag, RIGHT SIDES together......that is the flaps are inside.
And machine stitch the sides together from the fold up to the drawstring casing.
DO NOT sew through the drawstring casing.
Now the magic happens turn the bag inside out again and look what you should have!!
Grab your cord for the drawstring.
I find placing a safety pin on the end allows me to push it through the casing.
And there you have it .... a drawstring bag, with pockets.
I have skimped the drawstring bit, if you like I could explain that further. Just let me know.
I have basically done two loops.
I have cut my length of cord in two and created two loops through the drawstring casing.
One loop with both ends of the cord coming out of the left hand side of the bag, and other loop with the ends coming out of the right hand side of the bag.
When you pull on each side it draws the bag closed.
That I will explain in the next tutorial.
I have no more pictures.
I apologise but as this is my first tutorial I may have confused people....I would love your feedback so I can improve.
A Very Difficult Post to Write.......
This is a difficult blog post to write but if I am to be able to get this out of my mind then I can continue to carry on with honesty.
Normally I am one to repress my emotions and carry on as if nothing is wrong, and this in the past has led to me finally breaking down in a spectactular fashion......and not a pretty one either.
My father passed away last week......
Now I know this will resonate with readers in various fashions of remembered grief or difficult emotions...we all have a father but our relationships and memories will all be different.
My father was a difficult man to live with and our relationship was distant.
We had such similar personalities and intellect but he never saw that I was his mirror, he chose to see me as his adversary.
However as he grew older and more and more ill, he realised his mortality and tried in his clumsy way to reach back and tell me about himself.
I tried to swallow my hurt and anger but it was very hard in the initial stages.
Then I got the call from my mother and knew that this was no false alarm, he was gravely ill and was being prepared for palliative care.
I somehow was granted strength to face him in his weakened state,
and allow him to say whatever he needed to say.......my father talked for three days straight!!!
Finally he stopped the incessant chat and I was able to communicate with him........after 40 odd years of distance.
At the end of his life I was given permission to speak and allowed to show him the competent adult woman that I had become.
My father couldnt let go of the adolescent me during his life, he held on to the angry out of control teenager and wouldnt let her grow up.
As he drew closer to the end, I sat still and looked into his eyes with honesty and no anger. He drifted in and out of sleep, when he opened his eyes and saw me there, he finally saw me as I am now.
I know this is an intensely personal piece of writing but this was and
will be a huge part of my life and if I didnt get it out there I would be forever plastering a false sense of bravado on my blog. That is not my style.
My dad was all at once generous, selfish, loud, domineering, sensitive, insecure, funny, brave, weak, loving and angry.
He was complex but he gave me the greatest gift at the very end, and that was the chance to forgive.
Thank you if you have read this far and stayed with me, that means more than you will know.